Garlic Farming: Profitable and Lucrative Agribusiness Venture

Why Grow Garlic?

Garlic is a valuable crop in the onion family, used for cooking and medicine. It has a white or purple head, similar in size to an egg, made up of smaller cloves. When added to dishes, garlic, also known as kitunguu saumu gives off a strong and pleasant smell.

Garlic

Farming garlic can be profitable but requires close attention. Farmers need certified seed cloves, good soil, and sufficient water to grow quality garlic bulbs.

Nutritional Benefits

Health benefits of garlic include:

  1. Strengthening the immune system, hence helping fight off bacteria and viruses, and treating colds and flu.
  2. Helps in supporting heart health by improving blood flow and lowering blood pressure.
  3. Garlic is rich in antioxidants that may help prevent cancer.
  4. Helps in lowering cholesterol levels.

Garlic Varieties

In Africa, garlic is divided into two main types: soft neck and hard neck. Soft neck varieties are common in Kenya, including Africa giant, Arusha giant, and Rwanda giant. These come in various colors from white to purple.

Profitable Pineapple Farming in Kenya: Best Varieties, Tips and Market Opportunities

Best Areas for Garlic Cultivation

Garlic grows best in areas with low humidity, moderate rainfall, and stable temperatures. In Kenya, good growing regions include Nyeri, Murang’a, Kiambu, Kirinyaga, Machakos, Embu, Meru, Laikipia, Nakuru, Narok, Kajiado, and Bomet.

Suitable Climatic Conditions for Garlic Farming

The ideal climate for garlic features temperatures between 24°C and 30°C, moderate rainfall, and altitudes from 500 to 2000 meters. Garlic prefers well-drained, fertile soil rich in organic matter with a pH between 5.5 and 6.8. Testing the soil is important for preventing diseases and ensuring good production.

Planting

Garlic is planted by placing the seed cloves directly in the ground. Cloves can come from existing garlic or purchased. Buying certified cloves from local agrovet stores is best, as they resist pests and diseases.

Garlic Farming Under Irrigation

Field Preparation

The soils should be well tilled to provide a loose growing bed for bulb development; therefore soils should be ploughed thoroughly 3-5 times and leveled properly. Land set aside for garlic production should not have been grown with another Alliaceae family (onions, shallots and leeks) for 3 years to control pest and diseases as well as maintain soil nutrients. 

Cabbage Farming: Grow to Sell

The field is ploughed to the depth of 15- 20 cm and ensure to remove volunteer plants in the field in order to avoid spread of diseases. Then mix the soil with manure before planting.

Garlic grows best in well drained fertile soils that are high in organic matter, incorporating crop residues or well-rotted manure into heavy soils will result in the soil being suitable for production

Planting

Create ditches 25 cm apart, with 15 cm between each plant and 30 cm between rows. Plant the cloves root end down, covering them lightly with soil. After 7-10 days, the garlic will germinate. During this time, consistent watering is important, and mulch can help if needed.

Fertilizer Requirements

Applying manure/compost is vital for garlic production since garlic has longer growing period. Manure releases their nutrients slowly which is suitable for garlic growth and can improve storability of garlic. As garlic is shallow rooted vegetable and has un-branched root system and low nutrient extraction capacity, it requires relatively high amount of nutrients for best growth and development. Therefore, basal application of manure/compost is essential.

Organic manure provides nitrogen for early growth. After four weeks, apply organic foliar fertilizers every ten days to support leaf growth and bulb development.

Irrigation

Garlic has a rather sparse and shallow root system; therefore, it is sensitive to water stress throughout the growing season. Any period of dry soil conditions, especially during bulbing period will result in yield reductions. Irrigate every 3-4 days from planting until more than 80% of planted cloves sprout, then it can be reduced to once a week. Irrigation should be stopped 3 weeks before harvest or at maturity stage when leaves start senescing or turning yellow and necks become soft. Note that drip irrigation is the most effective method.

Mulching

Covering the soil surface with straw or any other materials to conserve soil moisture and suppress the weeds is essential. This method can also effective for rust disease control since mulch can protect soil from rain drop splash.

Weeding

Garlic has shallow roots and sparse canopy; therefore it’s difficult to compete with weeds especially at the early stage of growth. Weeding is done after germination to avoid uprooting of garlic plants by hand. First weeding is done 1-2 weeks after emergence, and second weeding 4-5 weeks after crop emergence. Do not weed when the soil is wet to avoid compaction. Deep cultivation close to the plants should also be avoided.

Common Pests and Diseases

Pests

Garlic naturally repels pests due to its strong odor. Common pests include red ants, thrips, and aphids.

Diseases

Diseases affecting garlic farming include, leaf rust, white rot, downy mildew, and powdery mildew.

Management

Regular weeding, field checks, and good sanitation help protect against pests and diseases. There is a wide variety of organic pesticides and fungicides to apply to garlic crops in case of advanced pest infestation.

Vanilla Planifolia Farming in Kenya
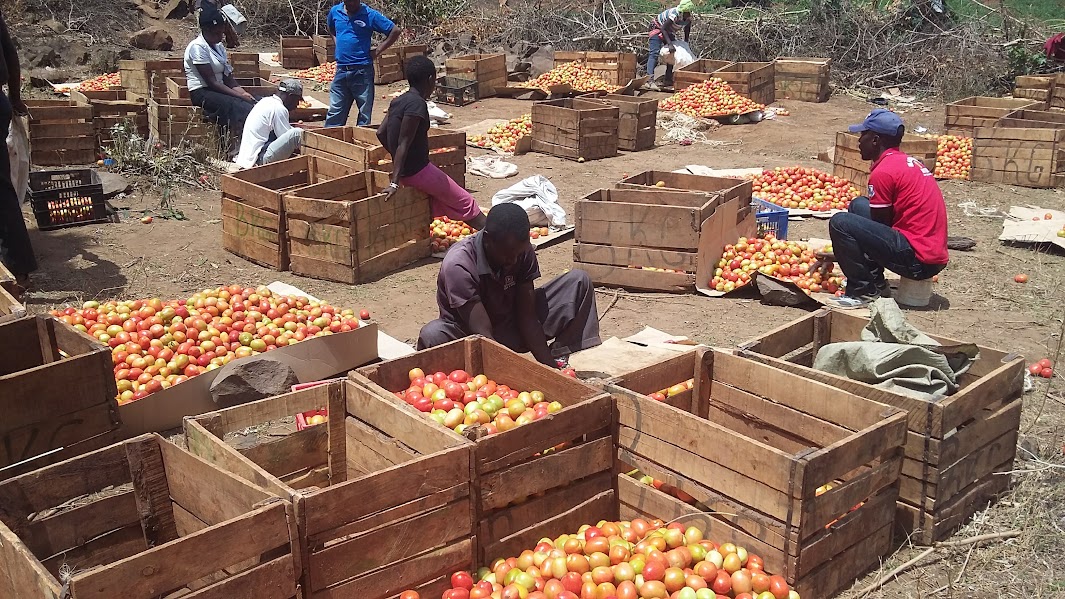
Garlic Harvesting

Harvesting is done from 90-120 days after sowing depending on the temperature of the growing area. Increase in bulb size of garlic continues until the leaves of the plants begin to dry, turning tan brown from the tips toward the base of the leaves. Bulbs should be harvested when leaves turn yellow, necks soften and/or bend over. Those bulbs have distinct and well-formed cloves which can store well.

A Garlic Farming Field

Early harvesting results in bulbs which are immature and tend to shrivel when cured. Late harvesting may lead to stained bulbs, decayed wrapper leaves and loss of roots leading to splitting of cloves due to attack by black mold and sclerotium rot.

Post-Harvest Handling

The purpose of the curing is to store longer duration and prevent diseases and pests, hence prolonging the shelf life. After harvesting, the plants should be moved from the field into a dark, dry, well-ventilated area for drying and curing of the bulbs. Bulbs should be moved out of the sunshine as quickly as possible after digging. 

Cowpea Production: A Complete Guide

Do not dry by laying the plants in the sunshine. Tops and roots can be removed after several weeks when drying and curing are complete. The top of a cured bulb is topped at about 2.5cm above the bulb. Hanging garlic bunches under ceilings of houses is also common practice to maintain planting material for next season.

Garlic Storage

Storage life under appropriate conditions could be 5-8 months at room temperature for seed purpose depending on the variety. Storage at 0 degrees Celsius and 60% relative humidity can prolong storage period. The higher the temperature the shorter the storage life. Adequate air flow and proper storage containers are important to remove transpired heat and moisture, otherwise, higher relative humidity provides suitable conditions for development of mold and root growth.

Market Outlook

The price of garlic fluctuates based on the season and quality, typically ranging from Ksh. 150 to Ksh. 250 per kilogram. A single garlic head can sell for Ksh. 10 to Ksh. 50. There is a strong demand for garlic in Kenya, as a large portion of the supply comes from imports, mainly from China. With an initial investment of Ksh. 75,000 on a quarter-acre farm, it is possible to produce between 1.2 and 1.5 tons of garlic, which can earn around Ksh. 120,000 to Ksh. 150,000. If managed well, garlic farming can be a profitable business with significant returns.

  • Seedlings per acre: 100kg garlic cloves
  • Spacing:  30 cm between rows, 15 cm between plants
  • Market price per kg: Ksh. 150 - Ksh.250
  • Yield per acre: 6-8 tons
  • Common pests: Red ants, thrips, and aphids.
  • Common diseases: Leaf rust, white rot, downy mildew, and powdery mildew.

Frequently Asked Questions

  • Is garlic farming profitable?
  • How much is 1kg of garlic seeds?
  • How many months does garlic take to mature?
  • How many kg of garlic to plant per acre?
  • Where is the best place to grow garlic in Kenya?
  • How many tons of garlic per acre?
  • What are the climatic requirements for garlic farming?
  • What is the best soil for garlic farming?


Profitable Black Soldier Fly Farming in Kenya: An In-depth Look at this Goldmine

The demand for sustainable protein sources is soaring. With over 30% of the world’s population relying on agriculture, finding effective solutions for food security is imperative. In Kenya, Black Soldier Fly (BSF) farming stands out as a promising driven by the increasing demand for sustainable protein sources.

Black Soldier Fly Larvae

Studies indicate that Kenya generates over 5 million tons of organic waste annually, highlighting not only waste management issues but also the potential for insect farming. Black Soldier Flies (BSF) presents an innovative solution, transforming waste into high-value protein for animal feed and other products. Known for their rapid growth and environmental benefits, BSFs offer an innovative approach to sustainable farming.  Let’s delve into the profitable aspects of BSF farming in Kenya by examining essential elements such as setup, feeding, harvesting, processing, and market opportunities.

Benefits of the Black Soldier Fly

BSF larvae are gaining popularity as a protein source for animal feed. Here are some of their advantages:

1. They have a protein level of up to 70%, making them an excellent choice for livestock.

2. Animals like pigs, chickens, and fish show high efficiency in gaining weight when fed BSF larvae. Pigs can be market-ready up to four weeks sooner.

3. These larvae consume organic waste, such as food scraps and manure, significantly lowering landfill waste.

Apple Farming: Uses, Propagation, Cultivation and Pests & Diseases Management

4. Using BSF larvae in closed systems can cut greenhouse gas emissions and decrease fossil fuel use linked to traditional animal feed production. It also helps lower emissions from manure piles.

5. The protein and antimicrobial peptides in BSF fats can enhance the growth and health of animals.

6. Farmers benefit economically by saving costs through efficient feed conversion and less waste. They also require fewer resources to obtain protein supplements for their livestock and poultry.

7. Additionally, farmers can explore business options like training and selling young larvae or pupae. Large-scale production of BSF larvae for sale is emerging as a market opportunity, especially in Kenya's pig farming sector.

8. Lastly, BSF larvae improve feed taste. When street pigs dig through organic waste, they are usually looking for these larvae. The appealing smell and flavor enhance the feed's palatability, promoting animal growth. This, in turn, makes the meat from BSF-fed chickens and pigs tastier for consumers.

Top 10 Most Profitable Agribusiness Ideas To Invest In 2025

As has been noted, pig manure is one of BSF’s favorite substrates, yet the emerging larvae, can be used by pig farmers as a source of protein for their pigs. The pig manure resulting from the whole process is much richer than the manure initially used as a substrate.

Life Cycle of the Black Soldier Fly

Let’s first understand its life cycle. Black Soldier Flies undergo four stages: egg, larva, pupa, and adult. Each stage requires specific environmental conditions for optimal growth:

Egg Stage: Eggs are laid on organic waste. They hatch within 4 days.

Larval Stage: Larvae feed for about two weeks, growing rapidly.

Pupal Stage: After feeding, larvae pupate for a week.

Adult Stage: They emerge, mate, and the cycle begins anew.

The life cycle of the Black Soldier Fly is approximately 38 days.

Black Soldier Fly

Steps for Setting up a Black Soldier Fly Unit

Site Selection

When establishing a Black Soldier Fly unit, key considerations must be made. Site selection is crucial for the caging system, which can be set up indoors or outdoors.

1. Indoor Facilities

Indoor facilities offer controlled environments for year-round production. They help in managing temperature, humidity, and light, making them ideal for harsh weather conditions.

2. Outdoor Facilities

Outdoor setups are suitable for areas with mild climates. They utilize natural sunlight and can support larger operations but require careful planning based on local climate to avoid seasonal issues.

Climate and Other Considerations

Temperature and Humidity: Select a location or use climate control to keep temperature and humidity at the right levels for breeding Black Soldier Flies.

Wind and Rain Protection: When setting up an outdoor unit, use windbreaks and shelters to protect your Black Soldier Fly colony from the elements.

Okra Farming in Kenya: A Comprehensive Guide

Ventilation: Good airflow is important to avoid overheating and ensure a steady supply of oxygen. Consider using mesh or perforated panels for better ventilation.

Drainage: Proper drainage is vital to prevent water buildup, especially outdoors. Make sure containers have drainage holes to let excess moisture escape and avoid conditions that promote bacterial growth or drown larvae.

Stackable Design: To save space, look for stackable container designs. This allows for vertical expansion, which is especially helpful in indoor areas with limited space.

Temperature and Humidity Control: To maintain ideal conditions, add heating or cooling elements as needed. In colder climates or indoor spaces, incorporate heating devices to keep temperatures suitable for the Black Soldier Fly colony, promoting active larval growth and development

Procedure for Setting up The BSF Unit

Stage 1- Obtain a starter population

Obtain a starter population of larvae to start a BSFL production system Purchase larva from a local source. The larvae or pupae cost between Ksh1000 and Ksh3000 depending on the composition of the kit, and they are available from farmers who are already rearing the BSF. By starting with eggs, if the air temperature is favorable (near 30°C), you can quickly obtain enough individuals to start a BSF colony. It was observed that the number of eggs laid per female BSF ranged from 206 to 639. An alternative to purchasing a starter kit is collecting eggs from wild BSF.

Stage 2- Establish a mating enclosure

Mating enclosures can range from large screened-in rooms to smaller systems using mosquito nets, or even mesh baskets. Regardless of the scale or design, the mating enclosure must maintain adequate moisture (around 70% relative humidity) and a temperature of 24 to 38°C while keeping the BSF in. Make provisions for adult flies, including a water source and some vegetation or other surfaces on which to hide and mate. A sugar source like honey and also a hydration point will prolong the lifespan of adults. The pupae will not eat any food, so you need only a small amount of food nearby to entice adult female flies to lay eggs.

Stage 3- Collect the eggs

To collect the eggs of the adult female BSF, provide favorable material for laying eggs within the mating enclosure. Small blocks of wood work well and provide both an inviting egg-laying environment and easy egg collection method for the workers. Using small pieces of cardboard may be logical, but the wooden blocks are convenient for collecting eggs and result in higher quantities of eggs. At this stage, it is important to note that BSF do not lay their eggs directly on (or in) a food source, but nearby to one. Blocks should therefore be near a food source. 

Revolutionizing Agriculture: A Dive into Layer Farming in Kenya

To collect eggs, remove the blocks, separate them from each other, and carefully scrape off the eggs with a toothpick or other small, pointed item. Eggs can be of different ages if workers do not remove the blocks each day. By having eggs of different ages, the larvae will hatch and grow at different stages, requiring added sorting and separation before maturity.

Stage 4- Transition from eggs to larvae

Transfer the collected eggs to a proper food source where they will hatch and crawl to the feedstock provided. This could be in a separate area. Use a mesh screen to separate the eggs from direct contact with the food source. Eggs will hatch within four days of laying. At this stage, while larvae are small, you can use plastic trays to hold small quantities of feed/waste and larvae. Ensure the depth of the substrate should be 2 to 3 inches.

Black Soldier Fly Frass

Stage 5- Select a proper feedstock

One advantage of BSFL is their ability to consume many types of waste. Use low-cost or even free waste by-products. BSFL prefer foods high in fats, proteins, and starches. You can mix waste resources together to ensure a balanced, or ‘complete’ feed source. This helps ‘bulk up’ the feedstock to ensure higher yields of larvae produced. For example, you could boost the protein content of plant waste by adding chicken manure.

Stage 6- Scale up production

As larvae hatch and feed, they need to be ‘scaled up’ into larger containers for adequate production. During this step, provide more feedstock for larvae to eat. How much feed to add will depend on larvae instar, and temperature. Check larvae at least once a day to ensure there is always an adequate food supply for growing larvae. When you add new feed, make sure to mix the old feed and new feed evenly throughout the container or add old feedstock and larvae on top of a bin with new feedstock. Larvae are light fearing and thus will move downward to the new feedstock.

Stage 7- Harvest the larvae

Over a period of 13 to 18 days, larvae will feed voraciously, eating twice their own body weight each day. Harvesting larvae before reaching maturity (shortly before the pre-pupae stage) requires sorting, sizing, or separation of larvae from their feed material. For larvae that are fed directly to livestock, removal from the feed source is unnecessary. Sorting and sizing are common for larger production systems but these activities are labor intensive. For easier separation, by the end of their production cycle, transfer larvae to a finer-textured feed source. Uniformly small food particles will then be easy to separate from the larvae. Use various sizes of screens to facilitate sorting and sizing.

Stage 8- Raising Pupae for Reproduction

At the pre-pupal life stage, BSF migrate from their food source in search of a dark, quiet place to transform into a mature fly. If checked regularly, it can be convenient, and provide a steady supply of pupae for reproduction. Transport these pupae to the mating enclosure before flies emerge.

Value Addition of Black Soldier Fly

Farming Black Soldier Fly larvae focuses on producing protein-rich larvae ideal for feeding poultry, fish, pigs, pets, and other livestock. The protein content in these larvae varies between 40% and 60%, depending on what they are fed. BSF larvae also provide a significant amount of fat, which can be used in various products, including feed additives, biofuels, and cosmetics.

A notable aspect of BSF farming is that it generates no waste. The main products are derived from the waste the larvae consume and the larvae themselves. The frass, or waste, from BSF larvae is nutrient-dense and serves as an effective organic fertilizer for plants. The larvae themselves offer high-quality insect protein with good digestibility and an excellent amino acid profile, making them a valuable nutritional source.

BSF Yield

A single container can yield 2 to 3 batches each month, resulting in about 1200 to 1500 kilograms of larvae and 2000 kilograms of frass, depending on the quality of the bio waste used. That’s significant! However, those who raise black soldier fly larvae outdoors often see considerable variations between batches due to differences in temperature and moisture levels.

Market Outlook

The Black Soldier Fly Market was valued at approximately 4.02 billion USD in 2024. It is projected to increase from 4.72 billion USD in 2025 to 20.12 billion USD by 2034. This market is expected to grow at a compound annual growth rate of about 17.5% from 2025 to 2034.

Locally, Black soldier fly price per kg is between Ksh. 100 to Ksh. 150 for dried BSF and the Black Soldier Colony ranges between Ksh. 1,500 -2,500 per kg.

Frequently Asked Questions

  • How much is a black soldier fly per kg in Kenya?
  • Is black soldier fly profitable?
  • What are the requirements for BSF farming?
  • How much is the black soldier fly market worth?
  • How long does it take to harvest black soldier fly?
  • How do you start a Black Soldier Fly Farm?
  • What are the benefits of the Black Soldier Fly?
  • What is the lifespan of the Black Soldier Fly?
  • What is the production yield of a Black Soldier Fly?

At Richfarm Kenya, we’re propagators of certified high quality fruit and vegetable seedlings. For services call or WhatsApp 0724698357/0723213602.


The Cost of Farming 1 Acre of Tomatoes in Kenya - 2025 Update

Tomato farming in Kenya is one of the agribusiness projects that has seen many investors become self-made millionaires. However, you should not be deceived into thinking that it is a get-rich-quick scheme. It involves a significant amount of capital and serious risks. Let me break it down for you.

The Money Math of Tomato farming in Kenya

The cost per acre of tomatoes in Kenya can vary based on factors such as location, choice of input, and labor costs. Below is an approximate cost based on averages.

1.      Land Preparation:

o    Plowing, Harrowing, and Trench Making: Ksh 10,000 to Ksh 20,000, depending on the method and equipment used.

2.      Seedlings:

o    Certified Seedlings: Approximately Ksh 40,000 for 8,000 seedlings.

3.      Soil Testing:

o    Around Ksh 5,000 to assess soil health and nutrient requirements.

4.      Fertilizers:

o    D.A.P. (80 kg): Ksh 6,400.

o    C.A.N. (120 kg): Ksh 9,600.

o    N.P.K. (120 kg): Ksh 9,600.

5.      Manure:

o    8 tonnes of goat or cow manure at Ksh 1,000 per tonne: Total Ksh 8,000.

6.      Agrochemicals (Pesticides and Fungicides):

o    Approximately Ksh 22,000.

7.      Irrigation:

o    Irrigation costs can vary significantly depending on source of water, weather conditions, soil type etc. We are taking an estimated Ksh 70,000 for irrigating an acre from transplanting to harvesting.

8.      Labor:

o    100 man-days at Ksh 300 per day: Total Ksh 30,000.

9.      Land Leasing:

o    Approximately Ksh 20,000 per year, though this can vary by region.

10.  Miscellaneous Expenses:

o    An estimated Ksh 30,000 to cover unforeseen costs.

Total Estimated Cost: Approximately Ksh 270,600 per acre.

We are always glad to help you get clarification on anything. Do not hesistate to reach us on 0724698357 / 0723213602 if you have any questions. 

Watermelon Farming in Kenya: A Profitable Investment in 2025

Watermelon farming is a key agricultural activity that focuses on growing watermelons (Citrullus lanatus) that are known for their sweetness and high water content, these fruits are increasingly popular. This guide is to assist you as a farmer in boosting your crop yields by selecting the best seed varieties and using effective planting methods. In Kenya, watermelon farming is very vital to the agricultural industry. The Kenyan climate, and particularly the warmer areas with plenty of sunshine are best places for watermelon farming.

Watermelon Farming in Kenya


As of 2024, watermelon farming in Kenya benefits from improved techniques, access to better seed varieties, and stronger market connections.

The presence of the new irrigation methods and better pest control methods have led to higher quality and quantity of watermelons, including government support and training programs that are also helping farmers enhance their practices.

How One Can Earn Up to Ksh. 800,000 in 4-6 Months From Onion Farming in Kenya: A Step-by-Step Guide

Climatic Conditions for Watermelon Farming

Watermelon grows best in warm areas with temperatures between 21°C and 35°C. The dry regions of Kenya are excellent for watermelon farming because they have long sunny days and little rainfall, which help the fruit develop.

Factors for successful Watermelon Cultivation

Weather: Watermelons thrive in warm weather. Extreme heat or cold hurts fruit quality. For juicy fruits, watermelons need full sun. Aim for 8-10 hours of sunlight each day.

Soil: Sandy loam soil is ideal for watermelons. Good drainage prevents root rot, and a pH of 6.0 to 7.5 is best.

Watering: Watermelons can handle some dryness. But, they need plenty of water when flowering and fruiting. Drip irrigation gives them moisture without too much water.

Fertilization: Good fertilizers for watermelons contain calcium, magnesium, and nitrogen. Boron and molybdenum are also helpful.

Take a look at The Money Math of Kienyeji Chicken Farming in Kenya in 2024

Best Regions for Watermelon Farming in Kenya
Several areas in Kenya are particularly good for growing watermelons because of their climate, soil, and water availability.

Regions that are the top choices for watermelon farming:
1. Eastern Region: Machakos
Due to the region's warm temperatures and well-drained soil, Machakos is great for watermelon farming.

2. Kilifi
With long sunny days and moderate rainfall, Kilifi’s sandy loam soils are beneficial for growing watermelons.

3. Makueni
Makueni's steady climate and sunshine help grow great crops. Watermelon farming thrives here too. Warm weather and irrigation ensure a dependable water source.

4. Coast
The Coastal Region, like Taita Taveta, is also ideal. Its warm, dry climate pairs with fertile soil. Farmers do benefit from nearby busy markets and these markets are perfect for selling watermelons.

5. Rift Valley Region: Kajiado
This southern Rift Valley area features a semi-arid climate with plenty of sunshine, good drainage and access to irrigation making it perfect for watermelon cultivation.

Baringo

The warm climate and abundant sunlight in Baringo support watermelon farming, with water from rivers and lakes meeting irrigation needs.

Generally, Kenya's varied climate zones create good conditions for growing watermelons, making it a practical option for many farmers. The fruit thrives mainly in arid and semi-arid areas, especially in the Eastern, Coastal, and Rift Valley regions, where warm temperatures and sunlight are plentiful.


Farmers sell the harvested watermelons in the local markets, supermarkets, and even for export, which greatly boosts their income.

7. Nyanza Region
Migori has a warm, humid climate and fertile soil, making it great for watermelon farming, benefiting from both rain and irrigation.

Homa Bay: With consistent temperatures and adequate rainfall, Homa Bay is favorable for watermelon growth, making it a profitable farming area.

8. Western Region: Bungoma
Bungoma’s climate is supportive of watermelon farming, with rich soils and moderate weather enabling diverse cultivation.


Busia
The tropical climate and fertile soil in Busia make it suitable for watermelon farming, with rivers and streams providing essential irrigation.

Northeastern Region: Garissa
Even though Garissa is dry, it is becoming important for watermelon farming due to irrigation projects that supply water. The high temperatures and plenty of sunlight are advantageous for growth.

Watermelon Harvest

Watermelon Farming Best Practices

a. Irrigation Methods and Water Management

Irrigation is essential for growing watermelons, especially when flowers and fruit develop. Common methods include:

1. Drip Irrigation: This system directs water to the roots, which saves water and keeps moisture steady. It also reduces the chance of fungal diseases from excess moisture on leaves and fruit.

2. Furrow Irrigation: Water flows through channels between plant rows. This method is less efficient than drip irrigation but can work well with proper management.
3. Overhead Sprinkler Irrigation: While it evenly distributes water, this method can lead to more diseases on the leaves and wasted water.

For effective water management:

  • Frequency: Watermelons need regular, moderate watering, especially in hot, dry times. Overwatering can cause root rot and other problems.
  • Timing: Watering in the early morning helps reduce evaporation and lets leaves dry faster, which lowers disease risk.
  • Mulching: Applying mulch retains soil moisture, controls weeds, and keeps soil temperature steady.

Fertilization Schedules and Recommendations

Good fertilization is key for strong watermelon growth and good yields. A balanced fertilization plan includes:

Pre-Planting: Mix well-rotted manure or compost into the soil to boost fertility and organic matter.
Nitrogen (N): Add a nitrogen-rich fertilizer at planting to encourage robust vine growth. Cut back on nitrogen after flowering to support fruit formation.
Phosphorus (P) and Potassium (K): Ensure enough phosphorus for root growth and potassium for fruit health. A balanced NPK fertilizer, like 10-10-10 is often suggested.

Micronutrients: Check that the soil has enough essential micronutrients such as magnesium, calcium, and sulfur. Foliar sprays can help solve specific deficiencies.

A typical fertilization timeline might involve:

  • At Planting: Use a balanced NPK fertilizer.
  • After 3-4 Weeks: Add a nitrogen-rich fertilizer as a side-dress.
  • At Flowering: Apply a potassium-rich fertilizer to boost fruit growth.

Pest and Disease Management in Watermelon Farming

Managing pests and diseases is vital for successful watermelon crops. Knowing common threats in Kenya and using effective control methods is essential.

SEE; PAWPAW FARMING IN KENYA: A GUIDE FROM PLANTING TO SELLING

Common Pests

1. Aphids: These are small insects that suck sap from leaves leading to wilting and slow growth of the plants.
2. Cucumber Beetles: The beetles feed on the leaves and can also spread bacterial wilt.
3. Cutworms: Here the larvae cuts down the young plants at the soil level.

Common Diseases Encountered in Watermelon Farming

1. Powdery Mildew: This is a fungal problem that shows as white powdery spots on leaves of the watermelon plant.
2. Fusarium Wilt: A soil fungus that causes yellowing and wilting of leaves.
3. Anthracnose: A fungal disease that results in dark, sunken spots on fruits and leaves.

Watermelon Farming in Kenya


Organic and Chemical Control Methods

Organic Control Methods

Crop Rotation: Change crops regularly to lower the risk of soil-borne diseases.
Neem oil works well against aphids. Marigolds and nasturtiums help keep pests away. Ladybugs are natural aphid predators. 
For tougher problems, use approved insecticides. Follow label directions carefully.

Fungicides can prevent powdery mildew. Rotate products to avoid resistance. Pre-emergent herbicides manage weeds. Weeds steal water and nutrients from watermelons.
Good irrigation and fertilization are also important. These practices create healthy plants and healthy plants produce higher yields.

Watermelon Harvesting

Harvesting watermelons at the right time is key. Ripe watermelons taste better. Look for these signs of ripeness. The bottom turns creamy yellow where it touches the ground. The tendril near the stem dries out. A ripe watermelon sounds hollow when tapped. The skin becomes dull. Most types ripen 80 to 95 days after planting.

Use a sharp knife to cut the watermelon. Leave a small piece of stem. Handle watermelons gently to prevent bruises. Harvest in the early morning for best results. Proper storage keeps watermelons fresh. Handle them carefully after harvest. This helps extend their shelf life.

Keep these tips in mind:
Cleaning: Wash off any dirt from the harvested fruits with clean water and a soft brush.

Cooling: Cool the watermelons right after harvesting to remove heat. This can be done with air cooling or hydro cooling.
Storage: Store your harvested watermelons in a cool and shady spot or room that has good airflow which is key. The ideal temperature range is 10°C to 15°C. Humidity should be 85% to 90%. Avoid storing below 10°C, as damage may occur. Check watermelons often for rot or damage. Remove any bad ones right away. This stops decay from spreading.

Use strong, ventilated bins to pack watermelons, making sure to cushion them to avoid bruising. Loading: Carefully load the crates onto the vehicle, ensuring they are secure and won’t shift. Avoid stacking them too high to prevent crushing. Transportation: Use vehicles with good ventilation and shade to maintain watermelon quality during transport. Refrigerated trucks are ideal for long distances to keep them fresh.

Watermelon Farming Cost per Acre and Profit

To grow watermelons on one acre, farmers need to invest around 11,000 for seeds and between 80,000 to 100,000 for land preparation and fertilizer.

Expected Returns from Watermelon Farming in Kenya

Returns per acre are expected to be $300,000 to $600,000. Seed type affects this number. Pest and disease control costs also matter.

Popular Watermelon Varieties Grown in Kenya

Some commonly grown watermelon varieties in Kenya include:
Sugar Baby melons, Crimson Sweet watermelon, Charleston Gray and Jubilee watermelon. The Sugar Baby watermelon is a favored variety among both farmers and consumers for its sweetness and compact size.

  • Seedlings per acre: 11, 000 seeds per acre
  • Spacing: 1.5 m between rows and 1m between crops
  • Market price per kg: Ksh. 60- Ksh. 100 
  • Yield per acre: 30-40 tons
  • Common pests: Cucumber beetle, Aphids, cutworms
  • Common diseases: Fusarium Wilt, Anthracnose, Powdery mildew
  • Lifespan: 80-90 days from seed to fruit

Frequently Asked Questions

  • Which season is best for watermelon in Kenya?
  • What is the best irrigation system for watermelon?
  • What is the best pest control for watermelon plants?
  • What are the conditions for watermelon farming?
  • What are the common pests and diseases affecting watermelon farming?
  • What is the cost for watermelon farming?
  • How are watermelons harvested?

Contact Richfarm Kenya via 0724698357/0723213602 to order certified, high-quality fruit and vegetable seedlings.


Featured post

Avocado Farming In Kenya: What You Need To Know

Avocado farming in Kenya, as well as around the globe, is gaining prominence, mostly because of the nutritious benefits of the fruit and bei...